Programmierkurs Python
Appendix
def is_even(i):
    if i%2==0:
        return True
    if i%2==1:
        return False
foo = is_even(2)
def is_even(i):
    if i%2==0:
        print(True)
    if i%2==1:
        print(False)
foo = is_even(2)
True
def is_even(i):
    return i%2==0
is_even(3)
False
import matplotlib.pyplot as plt
import numpy as np
import imageio

%matplotlib inline
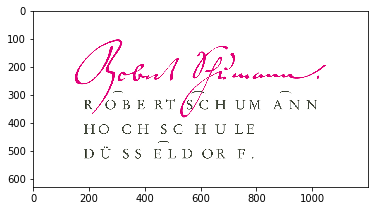
im = imageio.imread('rsh_logo.jpg')
plt.imshow(im)
<matplotlib.image.AxesImage at 0x1221c5150>

im.shape
(630, 1200, 3)
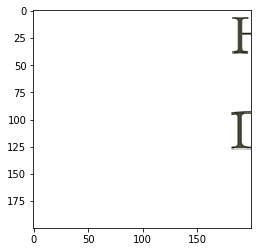
plt.imshow(im[400:600, 0:200, :])
<matplotlib.image.AxesImage at 0x122508b50>

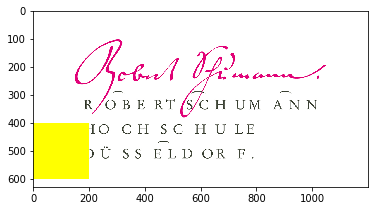
im[400:600, 0:200, :] = [255, 255, 0]
plt.imshow(im)
<matplotlib.image.AxesImage at 0x122589ed0>

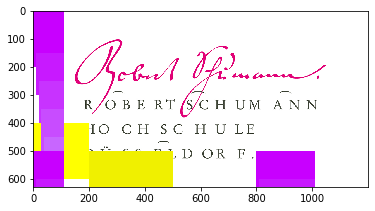
im[500:700, 200:500, :] = [240, 240, 0]
for i in range(10):
    im[
        500 + i * 100 : i*100 + 700,
        800 + i * 10 : i*10 + 1000,
        :
    ] = [200, 1/10*255*i, 255]
plt.imshow(im)
<matplotlib.image.AxesImage at 0x1227f9350>

imageio.imsave('rsh_new.png', im=im)
im = imageio.imread('rsh_new.png')

for i in range(100):
    imageio.imsave(f'rsh/rsh_logo_{i}.jpg', im)
    # imageio.imsage(f'rsh\\rsh_logo.jpg')
    im = imageio.imread(f'rsh/rsh_logo_{i}.jpg')
imageio.help('rsh_new.jpg')
JPEG-PIL - JPEG (ISO 10918)

    A JPEG format based on Pillow.

    This format supports grayscale, RGB and RGBA images.

    Parameters for reading
    ----------------------
    exifrotate : bool
        Automatically rotate the image according to exif flag. Default True.
    pilmode : str
        From the Pillow documentation:

        * 'L' (8-bit pixels, grayscale)
        * 'P' (8-bit pixels, mapped to any other mode using a color palette)
        * 'RGB' (3x8-bit pixels, true color)
        * 'RGBA' (4x8-bit pixels, true color with transparency mask)
        * 'CMYK' (4x8-bit pixels, color separation)
        * 'YCbCr' (3x8-bit pixels, color video format)
        * 'I' (32-bit signed integer pixels)
        * 'F' (32-bit floating point pixels)

        PIL also provides limited support for a few special modes, including
        'LA' ('L' with alpha), 'RGBX' (true color with padding) and 'RGBa'
        (true color with premultiplied alpha).

        When translating a color image to grayscale (mode 'L', 'I' or 'F'),
        the library uses the ITU-R 601-2 luma transform::

            L = R * 299/1000 + G * 587/1000 + B * 114/1000
    as_gray : bool
        If True, the image is converted using mode 'F'. When `mode` is
        not None and `as_gray` is True, the image is first converted
        according to `mode`, and the result is then "flattened" using
        mode 'F'.

    Parameters for saving
    ---------------------
    quality : scalar
        The compression factor of the saved image (1..100), higher
        numbers result in higher quality but larger file size. Default 75.
    progressive : bool
        Save as a progressive JPEG file (e.g. for images on the web).
        Default False.
    optimize : bool
        On saving, compute optimal Huffman coding tables (can reduce a few
        percent of file size). Default False.
    dpi : tuple of int
        The pixel density, ``(x,y)``.
    icc_profile : object
        If present and true, the image is stored with the provided ICC profile.
        If this parameter is not provided, the image will be saved with no
        profile attached.
    exif : dict
        If present, the image will be stored with the provided raw EXIF data.
    subsampling : str
        Sets the subsampling for the encoder. See Pillow docs for details.
    qtables : object
        Set the qtables for the encoder. See Pillow docs for details.
im = imageio.imread('rsh_new.png')

for i in range(100):
    file_name = f'rsh/rsh_logo_{i}.jpg'
    imageio.imsave(file_name, im, quality=100-i)
    im = imageio.imread(file_name)
Scope
Der Scope einer Funktion gibt an ob wir Zugriff auf eine Variable haben oder nicht.
In Python hat man in der Regel nur Zugriff auf die Variablen aus der kleineren Einrückung und die über der Zeile stehen.
foo = 42

if bar is True:
    print(foo)

bar = True
foo = 'Hello'

def my_func():
    print(foo)

my_func()
Hello
del foo

def my_func():
    foo = 42
    bar = 2
    return bar

print(foo)
---------------------------------------------------------------------------
NameError                                 Traceback (most recent call last)
<ipython-input-27-31504fd18de0> in <module>
      6     return bar
      7
----> 8 print(foo)

NameError: name 'foo' is not defined
import
Ein großer Vorteil von Python ist, dass die Programmiersprache eine große Standardbibliothek hat. Die Standardbibliothek ist bei jeder Python Installation verfügbar und die einzelnen Module müssen importiert werden.
Ein Beispiel kennen wir dabei schon.
import random

print(random.randint(0, 100))
99
Das random Module der Standardbibliothek ist z.B. dokumentiert unter https://docs.python.org/3/library/random.html.
Alternativ kann man sich mit in Jupyter den docstring anzeigen lassen indem man ein ? dem Ausdruck voranstellt.
?random.randint
Signature: random.randint(a, b)
Docstring:
Return random integer in range [a, b], including both end points.

File:      /usr/local/Cellar/python/3.7.6_1/Frameworks/Python.framework/Versions/3.7/lib/python3.7/random.py
Type:      method
Ein paar sehr hilfreiche Module aus der Standardbibliothek
Modul |
Funktion |
|---|---|
regex (pattern matching auf strings) |
|
rechnen mit datum |
|
Pseudozufallszahlen |
|
Dateisystemzugriff |
|
Dateioperationen |
|
SQlite3 Datenbank |
|
Zeitoperationen |
|
Logging |
|
E-Mails erstellen |
|
JSON En-/Decoder |
|
XML Operationen |
|
Unittesting |
Dateizugriffe
Eine Datei kann man öffnen, lesen, schreiben und schließen. Dabei unterscheidet man zwischen Textdaten (z.B. Quellcode, markdown) und Binärdaten (z.B. Bilder).
Dateizugriffe sind immer sehr kritische Operationen da wir nicht wissen ob
die Datei existiert
wir Zugriff auf die Datei haben
wir die Datei schreiben können
Daher immer aufmerksam sein da man schnell auch Dateien kaputt machen oder überschreiben kann!
data = None
with open('README.md', 'r') as f:
    data = f.read()

print(data[0:100])
# Einführung in die Programmierung mit Python

Eine Einführung in die Grundlagen der Programmierung
mode |
Funktion |
|---|---|
|
Liest Text Datei |
|
Liest Binär Datei |
|
Schreibt Text Datei |
|
Schreibt Binär Datei |
my_text = """
It can happen to you
It can happen to me
"""

with open('my_text.txt', 'w') as f:
    f.write(my_text)
Installiert euch Visual Studio Code.
Visual Studio Code ist ein Code Editor für verschiedene Programmiersprachen.
Script schreiben und ausführen
Jupyter Notebook ist gut zum partiellen ausführen von Code-Blöcken - jedoch eignet es sich nicht gut als Script welches man eine bestimmte Anzahl von malen ausführen möchte.
Dafür legt man in einem Editor (z.B. Visual Studio Code) eine neue Datei mit der Endung .py an und schreibt dort den Code.
Wenn man die Datei abgespeichert hat öffnet man eine Konsole und wechselt in das Verzeichnis der Datei und führt das Script mithilfe von
python3 my_script.py
aus.
PEP8
Wenn mehrere Leute an einem Projekt arbeiten ist es sinnvoll sich an sogennante Style Guidelines zu halten, die die Formatierung wie Namen von Variablen, Funktionen oder Art der Einrückungen vereinheitlichen.
Bei Python nennt sich dieser Standard pep8 und ist hier sepzifiziert: https://www.python.org/dev/peps/pep-0008/
Art |
Konvention |
Beispiel |
|---|---|---|
Variablen |
alles klein, wobei Leerzeichen durch |
|
konstante Variablen |
alles groß geschrieben ‘ |
|
Funktionen |
alles klein, wobei Leerzeichen durch |
|
Klassen |
CamelCase |
|
git
git ist ein Versions Kontroll System (VCS - Version Control System) womit mehrere Leute an einem Textprojekt arbeiten können. Jede Veränderung ist ein inkrement und